Social Media Icons

Sunday, July 27, 2014

New Zoya Nail Polishes

I finally received my 3 free nail polishes from Zoya and their promotion around the 4th of July. I've never tried these polishes before so I thought this deal was a good opportunity.

Now Zoya is not listed on the PETA's Companies That Don't Test List, however the products don't contain formaldehyde, formaldehyde resin, toluene, dibutyl phthalate, or camphor; which they refer to as the Big 5.

Now onto the fun colors I got...


Zuza
"Deep, saturated oceanic turquoise with gold and silver metallic shimmer and a foil-like finish"
This was my daring purchase, I'm not normally a glittery kind of person. But, I found the shimmer in this polish really does show up more like a foil. It's darker than I expected but it does have a beautiful sheen to it in the light.

Rue
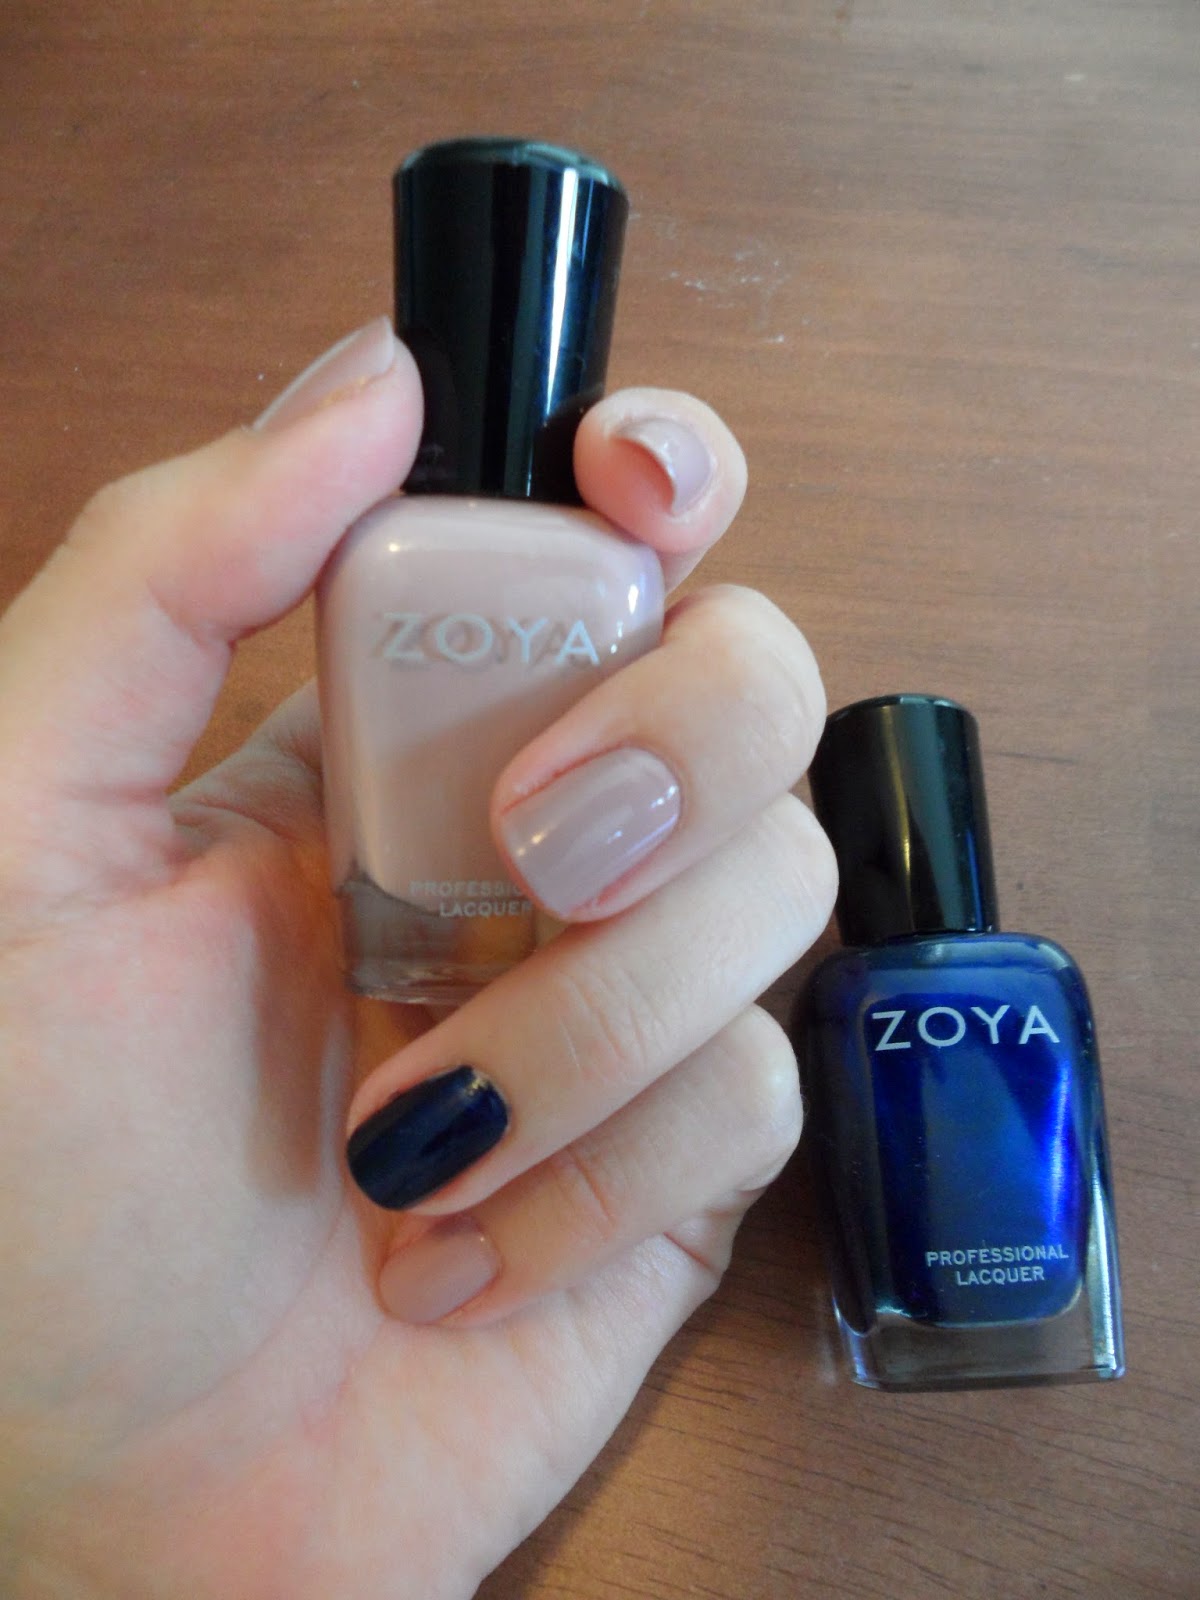
"full-coverage, boudoir blush cream"
I did find this polish to be full-coverage, it went on smooth and covered wonderfully in two coats. The color however, wasn't as pink as I was expecting. It's more of a nude with hints of mauve or lilac. But still a pretty creamy color.

Ibiza
"Blackened indigo-blue brightened slightly by subtle metallic blue shimmer"
This by far was my favorite of the 3. I only used it on 2 fingers but it went on like a dream and I only needed one coat. It is a very dark blue and although I don't really see the shimmer, it does have a silky kind of finish that may be from that.


Overall I was impressed with these polishes and how well they applied. Let me know what you think of the colors!

Tuesday, July 22, 2014

How I'm Fixing My Nails

For the last few years I've had some issues with my finger nails. They've been incredibly flimsy and bendable (not normal) and have been peeling. And let me tell you, it's been weird, like flakes of nail coming off to show layers underneath.

Overall, they were not healthy, nail polish wasn't sticking, and I needed to make a change. So after some discussion with my mom about this, she recommended taking calcium. So I went out and bought calcium pills. 

Also, I've been working on going through the PETA's Beauty Without Bunnies list of products that don't test on animals (more to come on this soon!) and I found a nail product on the list. So I purchased a treatment and top coat to start using. 

I bought the Nail-Aid Fast Dry Top Coat and Peeling Nail Intense Repair Gel (Link to both here). 


I've been taking the Calcium every day and using the Peeling Nail Intense Repair Gel and Top Coat constantly. I replace them once a week-ish. You can use a nail color in-between these as well, but I've been liking the looking of just shiny nails. I've been doing this for about four months now.

I have definitely noticed a difference! It's working :) 

My nails are much stronger, they don't bend over any more. And they aren't peeling almost at all. I am so excited that these products have been helping so much. I wasn't sure if a nail polish would do much, especially since these are not expensive at all ($6.50/each). But I've been amazed at the results and intend to keep using these until they're gone, and then buying more. 

So I know this was a quick post, but I wanted you all to know about this cruelty-free product that is working wonders on my nails!

My Fav Everyday Makeup Look

Ok, all so here is the makeup look that I wear everyday right now. It's a natural eye look with browns that all blend together. I think it looks really nice, especially for blue eyes, and it's nothing too over the top or crazy. So let's get started!

After my usual base (foundation, concealer, powder, bronzer, blush) and then my eyebrows, which I'm going to do a tutorial on later. I start my eyes. First, I apply a light base coat (this can be a light tan, pink, champagne, white, etc...) all over my lid. Here I am using a light brow/tan color from the NYX Adorable Pallete.

Next, I use a light brow/tan color (yes I just said I used this above... but hey you can extend it beyond the crease too!) Take that color up beyond the crease toward your brows and blend blend blend! You don't want any harsh lines with this. I also take a little of this color down onto my lower lash lines to round out the look.

Then I take a darker brown color on a smaller brush and apply it to the outer corner of my crease and then I gently blend it inward so that most of the color stays on the outer corner. You can also take a little of this color to the outer lower lash line.
Once it all looks good, then just blend all the edges so you don't have any harsh lines between colors. Now, you don't want to go crazy and get all the colors muddled together, so focus more on the edges. So this is how you should look now.
Now here you can add eyeliner. I usually do black on my top lash line but brown looks really good too. Then if my eyes are looking small or tired (which is always!) I put some white eyeliner on my lower water line. Then add the mascara and you're good to go! I know I look awkward here but I wanted to show how it all looks on my lids when I'm done.

LookED - one eye photo 20140708_193504_zps7b87c013.jpgLookED - closed photo 20140714_064754_zpsecedb404.jpg

Like I said this is my favorite makeup look and I wear it all the time... so I went a little crazy with the finished photos... but here they are!

LookED - in car photo 20140714_064733_zps79a15b5f.jpgLookED - beauty2 photo 20140708_193453_zps388f77a9.jpg


Monday, July 14, 2014

Get The Look: Summer Work Skirt

Get The Look: Summer Work Skirt


On my way into work this morning I saw this woman with the cutest outfit on which was the inspiration for my Get the Look today! She was adorable, office appropriate and summery all at the same time and the look was pretty simple. A black high-waisted pencil skirt, flowery blouse, light cardigan, and fun sandals. So here is my version... with leopard sandals of course!... I love it! As soon as I have money, watch out! I'm going shopping for this outfit :)

Wednesday, July 9, 2014

Easy Daytime/Work Makeup

By request here is my version of a pretty and pretty easy eye and makeup look for everyday or for work.

So here's how I start with no makeup on...eek!

First, I put on a sunscreen/moisturizer (hence the shiny face!) then I put on my Urban Decay Complexion Primer Potion. This stuff is great to keep your makeup on all day, especially in the summer when you might sweat just a touch. We're ladies you know! Then after that I put on the Urban Decay Eyeshadow Primer Potion to hold that eye shadow in place.

 photo SAM_0521_zps25c092fb.jpg
 photo SAM_0523_zps359cd986.jpg

Next was my foundation and concealer. For foundation I've been using the IT Cosmetics IT-O2 Ultra Repair Liquid Oxygen Foundation. This stuff is really nice. It's got a great medium consistency and goes onto your face like a dream. I usually do an all over light coverage with my fingers then dab on a little to cover any additional redness. But I'm sure I could build it up more for more coverage... I should try that. Then I use Physcian's Formula Super CC+ Concealer to cover any spots and under eye circles. This stuff is okay coverage, but I do find that it doesn't last that long so if you know of a good concealer let me know!

 photo SAM_0535_zps69e81c0b.jpg photo SAM_0537_zpse362c74b.jpg

Finally, the powders! I used a Studio Gear powder on my T-zone just to help me finish this product off, it's really not all that great and doesn't last all day. But then I used an old Physician's Formula blush I love which gives you that natural glow from within kind of feel.

 photo SAM_0538_zpsf20fe54b.jpg photo SAM_0539_zps6e59f1fa.jpg

Then to make the look easy I used just one eye shadow duo by ELF. Although you can't really tell in the picture this is a yellow-y golden brown color with lost of shimmer.


I added the lightest color all over my lid with my finger (your best tool!). Then I took a big fluffy eye shadow brush with the darker color and put it my crease. Then when there was just a little color left on the brush I blended out the edges. Finally I took a shimmery white color for the corners of my eyes and for my brow bone.

Then I finished off the look with some black eyeliner just at the lash line and my Too Faced Better Than Sex Mascara.

Oh yea and some lip gloss on my big 'ol lips! I used this ELF one

And here's the final look with and without glasses. I wasn't sure how this eye shadow would look on because it's not my normal brown or bronze but I quite like it... let me know what you think.
 photo SAM_0544_zps63e84251.jpg photo SAM_0552_zps930c1a75.jpg

Thank you all for reading!


Tuesday, July 1, 2014

Style Trials: Crown Vintage Wedges

Style Trials - Crown Vintage Wedge Sandal


I decided to start a new feature... Style Trials! Ok so the name is a little awkward, but it'll do. So in Style Trials I will try to take one item of clothing or shoes that I already own and style it a few different ways. This can help me see what options I have (and what I need to shop for) and you all can tell me what you think and if you have any ideas!

So for the first ever Style Trials I have these Crown Vintage Delight Wedge Sandals I bought last year. I wear them from time to time at work but rarely outside of that. And since I have a 4 day weekend coming up, I'd thought it'd be a great time to think of something else to wear with these shoes. 

Outfit 1 -  Is my summer staple, jeans and a tank. I love these American Eagle jeans (especially folded up at the bottoms) and I actually own them... yay! I paired the jeans with a little tank in this aqua color which I am in love with at the moment and of course a funky gold necklace and bracelet to bring out the gold sparkle in the shoes.

Outfit 2 - OMG I want this dress so very bad, A) it's leopard print, B) great shape, and C) it gets all girlie at the bottom with flowers. I might have to run to HM once I get paid to buy it :) Then I simply paired the dress with a big gold cuff to bring just a little more to the outfit!

Well let me know what you all think of the outfits: which one's your favorite or if you have any other suggestions for the shoes.

And have a happy fourth of July!